gs500e.fr
Réfection du freinage avant( Tutorial réalisé par Marc ) |  |
caliper rebuild, master cylinder rebuild and pad replacement.
I went for a ride with a group of friends and after some fun, my front
brake refused to work anymore.
Rotor and pads were smoking bad and disk turned blue. I stopped and
waited for a while. It worked again but something was not fine with it.
I decided to inspect the caliper closely and found that dust seals were
cooked. It was time for a rebuild.
 |
Start by removing the bolt that secures the hose to the fender. |
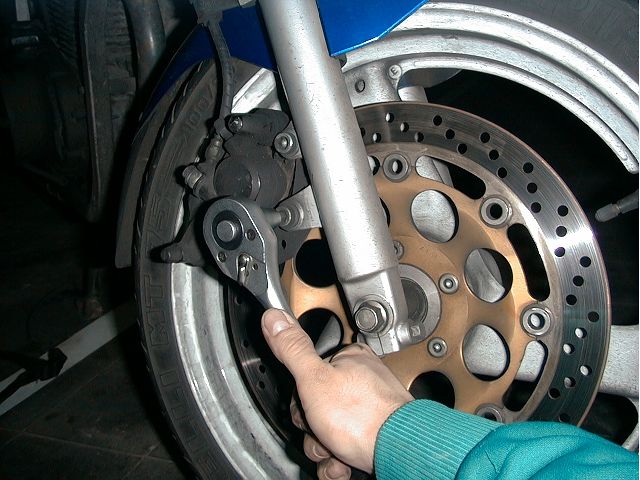 |
Remove both bolts securing the caliper to the fork. |
 |
See the image: hand is pressing support towards pistons, so that brake pads are released. |
 |
Pad is released.
It's quite difficult to figure out how this works.
|
 |
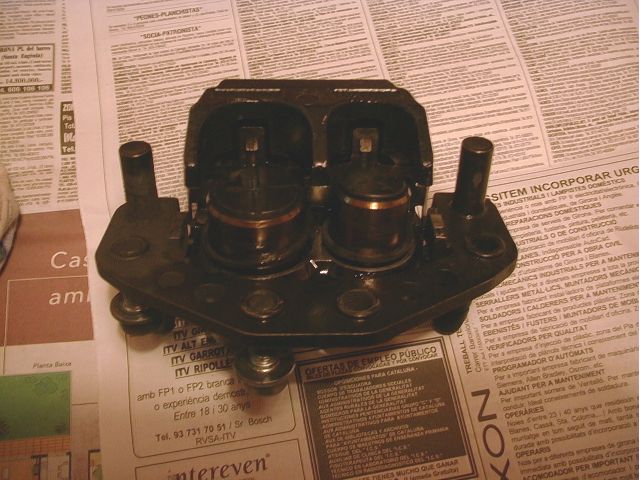
Ooops! Dust seal is out of its groove.
Bigger piston's dust seal is damaged too. (can't see it in the photo). Advice: Clean piston surface before pressing them into the caliper when doing the pad replacement work, otherwise they will pull dust seals out of its place. It's time to fix this.
|
 |
You will need to pull both pistons out of the caliper to see seals
and dust seals condition.
They are difficult to remove: press the brake lever and you will note the pistons move out. If one of the pistons is not moving, hold the moving one into the caliper to force the stuck one it to move. Press the lever till both pistons are not far to get out of the caliper. Pull one of them and a lof of brake oil will spill out of the caliper. Be carful: it is toxic and will ruin your skin and painted parts of the bike. You'd better wear rubber gloves. |
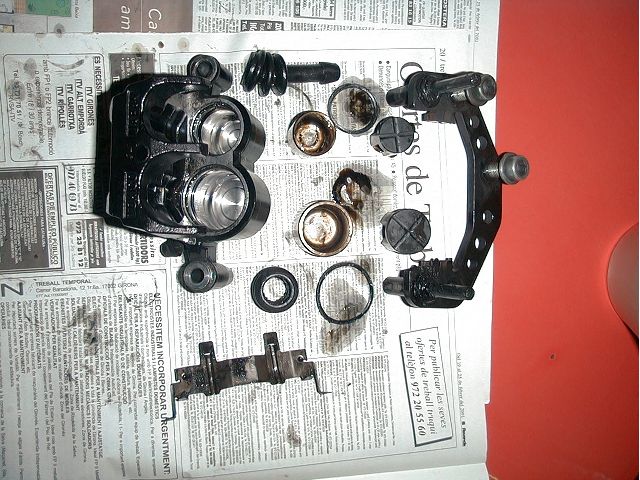 |
Disassemble everything.
Seals and some rubber from the dust seals are still into the caliper in this figure. See how to remove them. |
 |
Use a piece of wood to remove seals.
Use a piece of wood too to wipe out any dust/rubber in the grooves of the caliper. It's a difficult work, but *must* be done. Do not use a metal screwdriver or you will damage caliper body and you'll need a replacement. (expensive) |
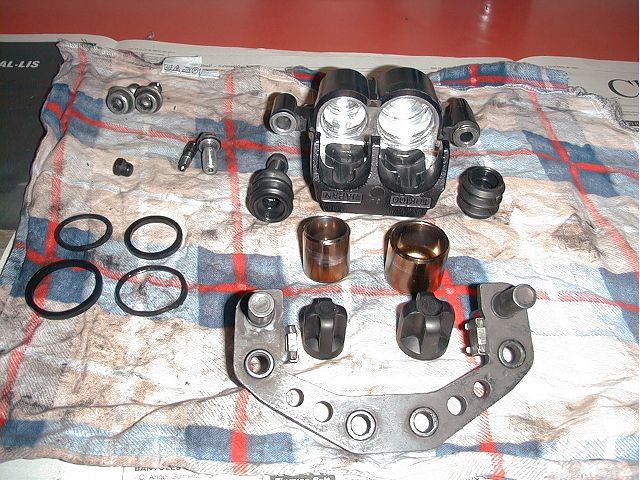 |
All parts were washed with diesel and then with soapy water.
Then I waited some hours till they were completely dry and
Reassembly is easy: seals and dust seals are *very* easy to
|
 |
Remove master cylinder from the bike. |
 |
Remove master cylinder lever and the rubber boot (dust seal) that keeps
master cylinder clean. You will find a circlip that will need to be removed
with a special tool
.
See the photo. |
 |
Piston will come out of the master cylinder body. Inspect seals for
damage. If less than *perfect* replace the whole piston+seals. (they are
not sold separately).
My local Suzuki dealer told me that master cylinder is not a part prone to failure. They do not wear out easily, but seals might be damaged by wrong brake oil (mixture of different oils). |
 |
Wash parts (I used soapy water and wait it for a complete dry)
Lube piston rubber rings before installing them into the master cylinder body. Use fresh brake oil to lube them. WARNING: brake oil is toxic and will ruin your skin. Use rubber gloves to manipulate parts in contact with it. |
 |
Master Cylinder just assembled again. I did not replace any parts,
just the rubber boot. I lubed everything.
It's a good idea to replace top cover gasket. In this operation, I installed a steel braided hose and a brand new rotor (NISSIN). |
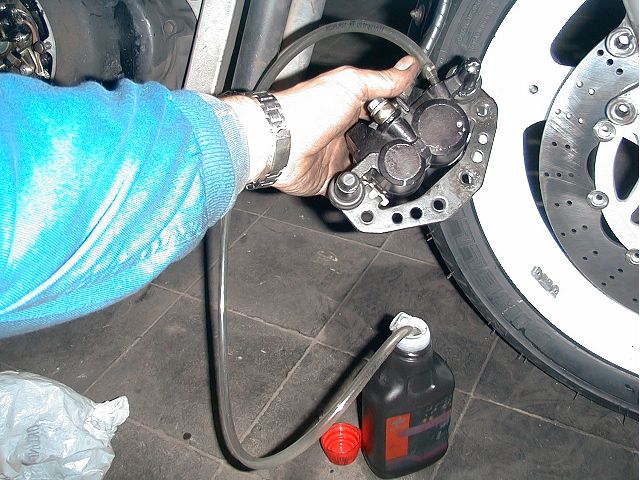 |
OK, reinstall everything on the bike and it's time to bleed the circuit.
Get a rubber hose, plug it to the caliper and to a can with brake oil. |
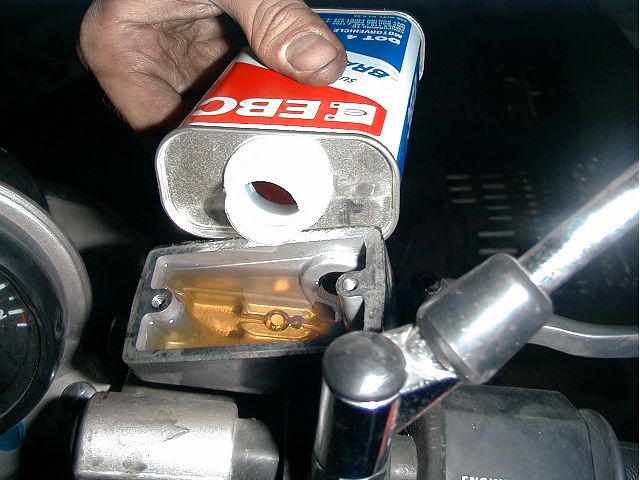 |
Drop oil into the reservoir.
Press the lever to push some oil into the hose. It will take some time (and a lot of pushing on the lever) to fill the caliper. You will need to refill the reservoir a lot of times. |
 |
The trick for a good bleeding job is:
|
 |
Install brake pads.
These in the photo are a couple of NISSIN syntherized pads.
|
 |
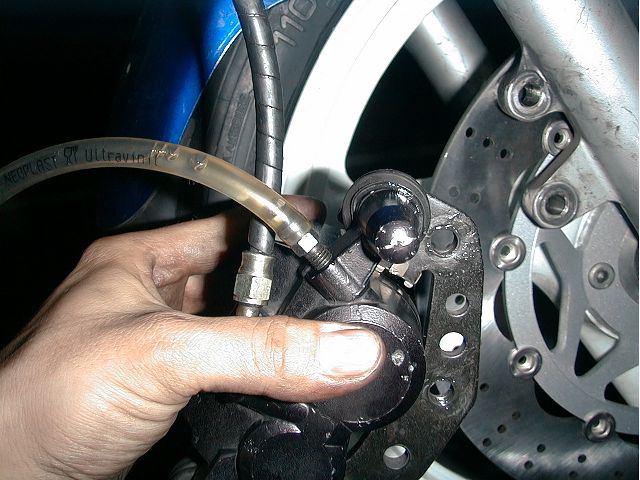
Work done.
It might be necessary to continue bleeding after installing the caliper on the disk rotor. Front brake system in the Suzuki GS500 is quite difficult to bleed: take your time. Be careful with next things when doing the job:
|
 MENU
MENU
- Historique
- En vrac
- Fiche Technique
- Galerie ( indisponible )
- Videos
- Entretien / Mecanique
- Microfiches
- Accessoires / Modifs
- Forum
- Sorties/Rencontres
- Revue de presse
- Liens
- Webmaster
- Contact
 |