gs500e.fr
Nettoyage des carburateurs, réglage des jeux aux soupapes et inspection de la chaine de distribution.( Tutorial réalisé par Marc ) |  |
A friend of mine was selling his old GS500 '91. He could not afford the insurance and had his bike abandoned in a parking for about 2 years.
I got it. It had 39000Km on the counter and a lot more of problems that have been being solved since I got the bike in september2000.
The bike had a dead battery that came back to life after a good charge (can't believe it!) but refused to start. I'm sure it was because of the old fuel in the tank. So I went, got the Clymer manual, and started some maintenance on it.
The carburetor cleaning, valve job and camshaft chain inspection I did
on October2000 was repeated in March2001 because the bike was not working
propperly. The photos shown in this web were taken during this second 'rebuild'.
Click on the photos to see bigger (higer resolution)
ones.
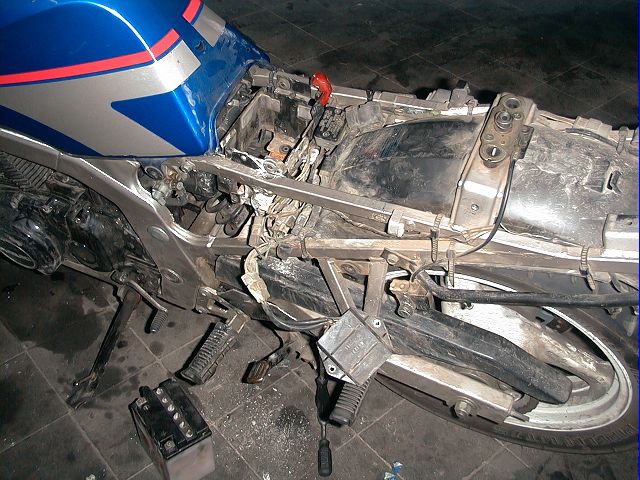 |
Aspect of the bike, after the seat and side covers removal.
Somebody installed a wrong battery (breather in the opposite side). The vapors coming out the battery rusted (nearly eated) cables connectors and fastons of the black box. Not a good spectacle to see. |
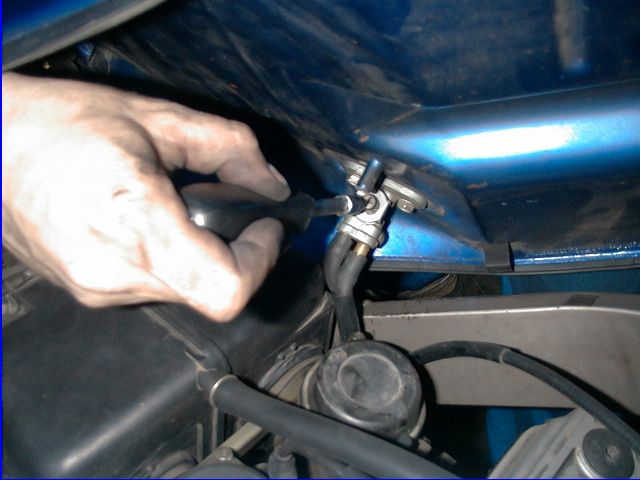 |
Remove the tank. Only 2 screws.
Close the cock under the tank and remove hoses. Larger tube (right in the photo) goes to L shaped intake in petcock.
|
 |
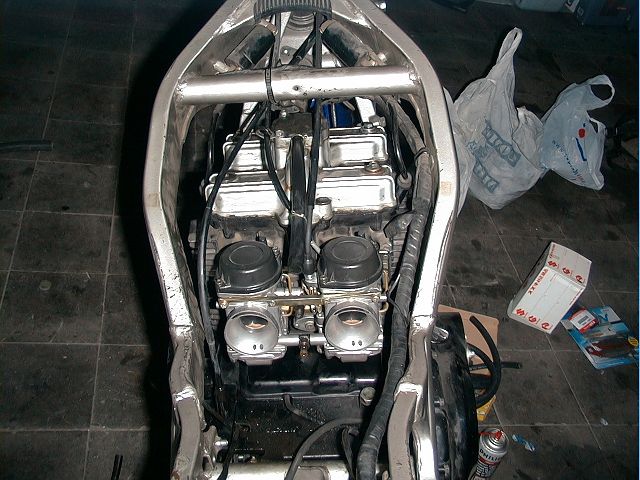
Remove air filter. 2 screws at each side of the frame, and 2 that
will link to the carburetors. At this time, you might want to start the bike and see how both carburetor
slides work as you wind the throttle.
You might see the "slides jumping spectacle": At low rpm, when the engine sucks air, slides lift up because of the vacuum generated. As soon as valve closes the air flow, they will fall down again. Soon you will run out of fuel. |
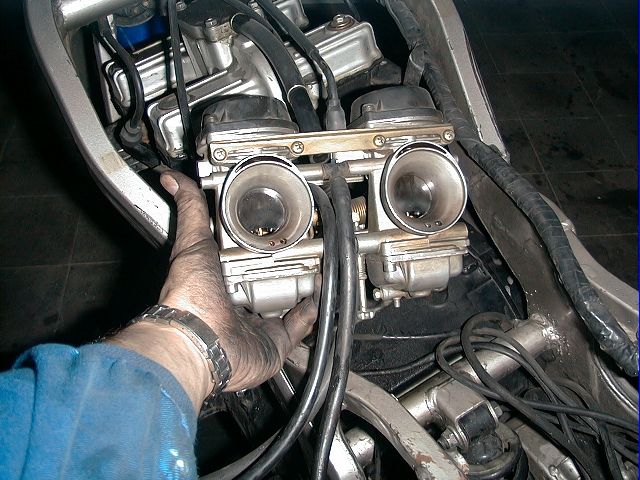 |
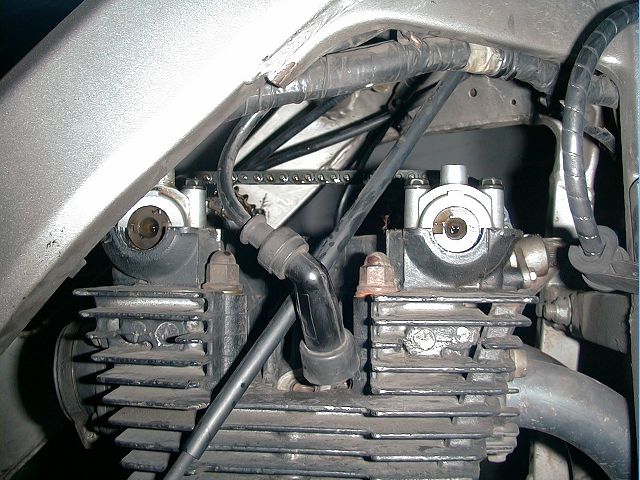
2 screws will hold carbs to the engine intake manifolds.
Remove gas cable and choke cable.
|
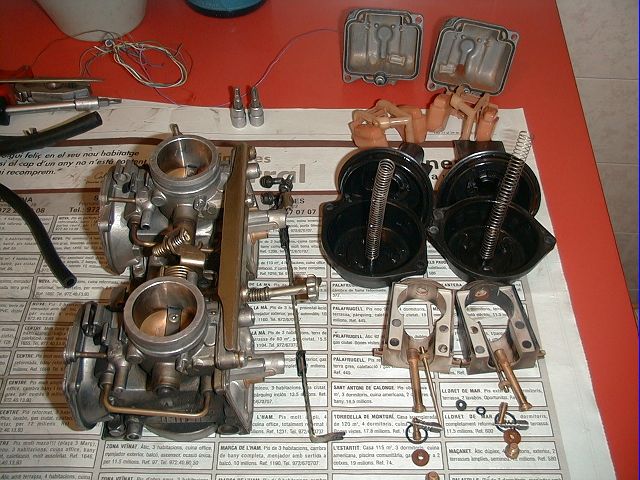 |
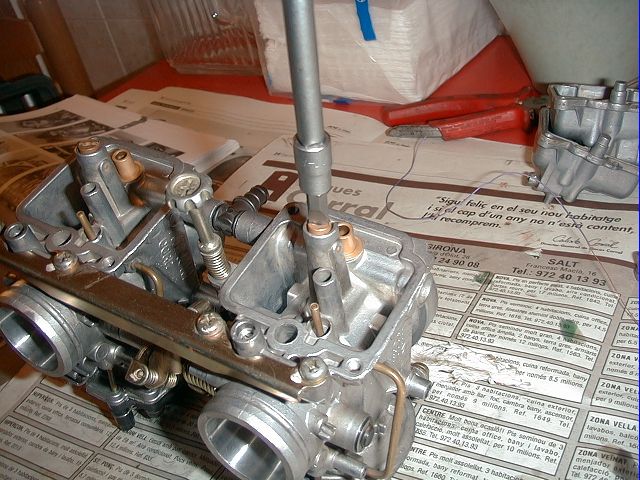
Disassemble everything:
|
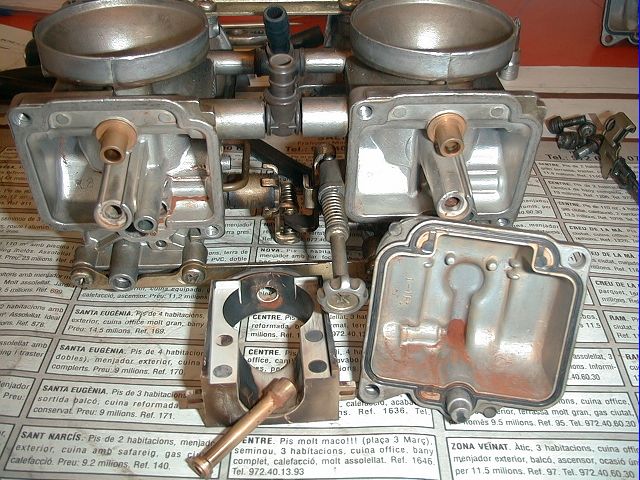 |
See how dirty came out the bowls.
See the needle jet with little holes full of dirt (rust coming from the tank) There was a thorough clean work done here, and it only needed 6000Km to show again this dirty aspect. Guys: keep rust from getting your tank. |
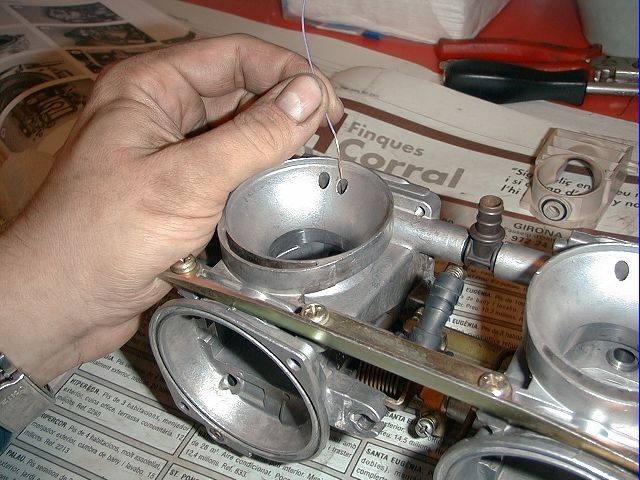 |
Clean thoroughly carbs bodies.I used diesel and a brush. Then rinsed
with soapy water. Some diesel and a thin wire will let you clean all these
little holes where dirt uses to hide.
|
 |
Just installing the needle jet.
|
 |
I use to lubricate parts with 2-strokes oil. |
 |
Installing the main jet. |
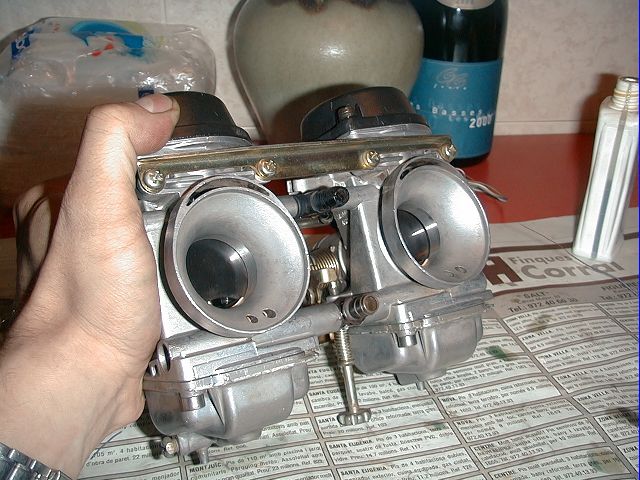 |
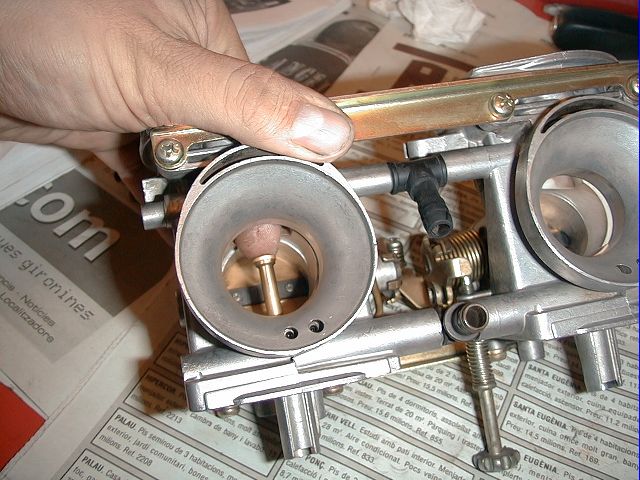
Carburetor assembly rebuild finished.
Mixture screw set to 2 turns out (default). Play with 2 to 4 turns out. Jet needle in the middle position, might want to lift it by 1 notch to get a richer mixture. (GS500 uses to be lean at high RPM) |
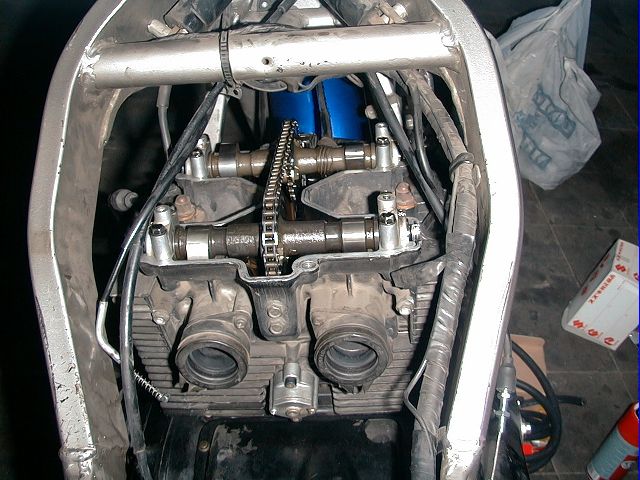 |
Okay returning to the bike let's check camshaft to shim clearance.
It should be between 0.03mm and 0.08mm
Remove valve cover by:
|
 |
You will need a thickness gauge to do the valve job.
It's not expensive but a little difficult to find one that will suit your needs. You need one that will neasure 0.03mm and 0.08mm I got that in one of these cheapo tool kits (100 tools for 25$)
|
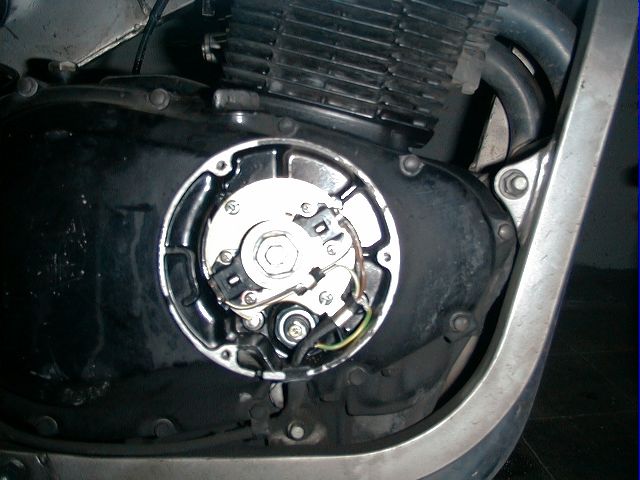 |
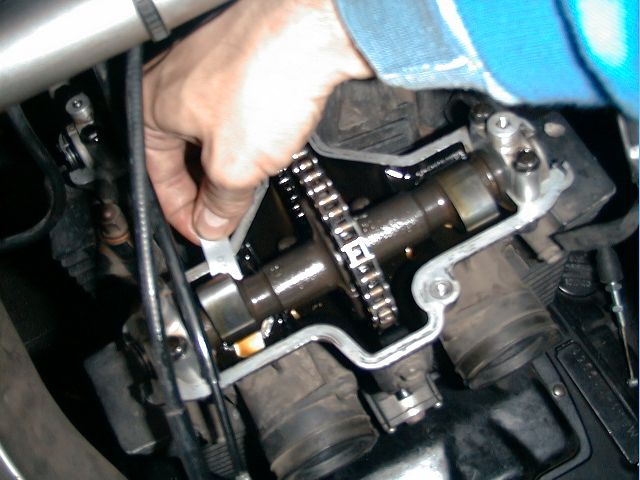
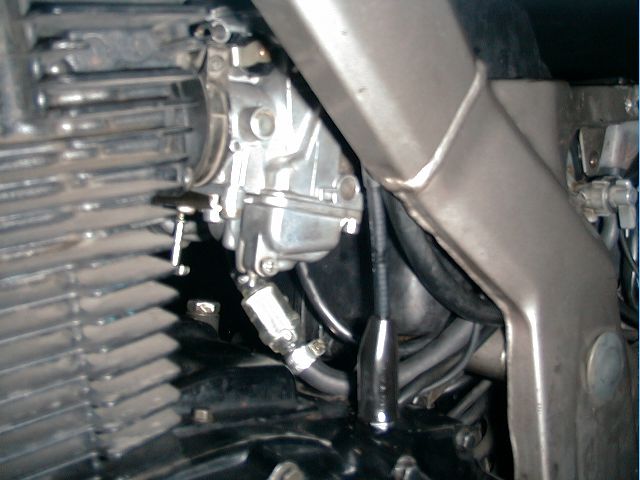
Remove right "suzuki" cover and locate the R and R-T marks.
Align pick-up with R-T mark with a 19mm wrench. |
 |
The marks on the camshaft should be facing one to another.
If they are one opposite to another, turn the crankcase 1 complete turn and realign pickup to R-T |
 |
With the engine at that point (see 2 last photos) measure the
gap under the camshaft lobes in all but exhaust left valve. Slide a thickness gauge between the camshaft and the shim.
Rotate the engine 1 complete turn to measure exhaust-left valve. To replace shims you can use a special tool. I don't have one: I removed camshaft supports and replaced it easily. |
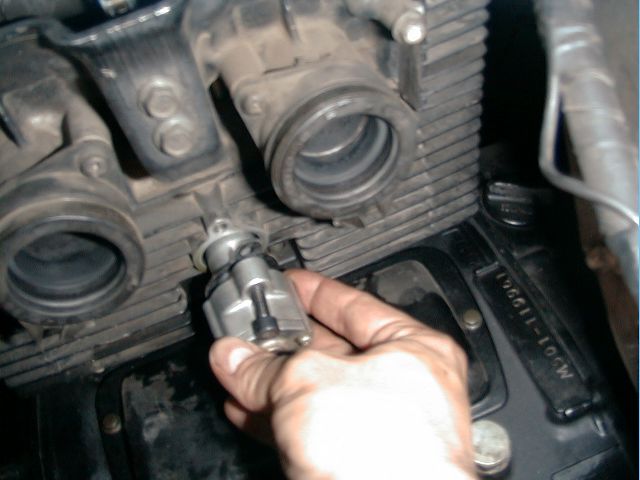 |
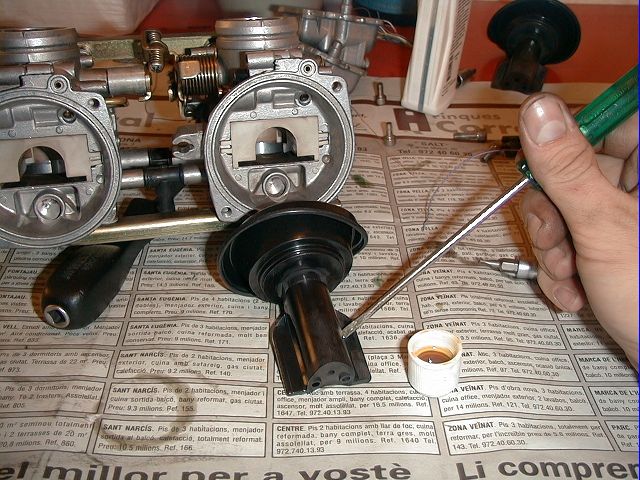
Now it's a good time to check if camshaft chain tensioner is OK.
Remove 2 allen bolts and remove tensioner. You will surely hear a "klatch" when you remove it: it's the tensioner that relaxed its spring. |
 |
Use a screwdriver to check that camshaft chain tensioner is working OK. |
 |
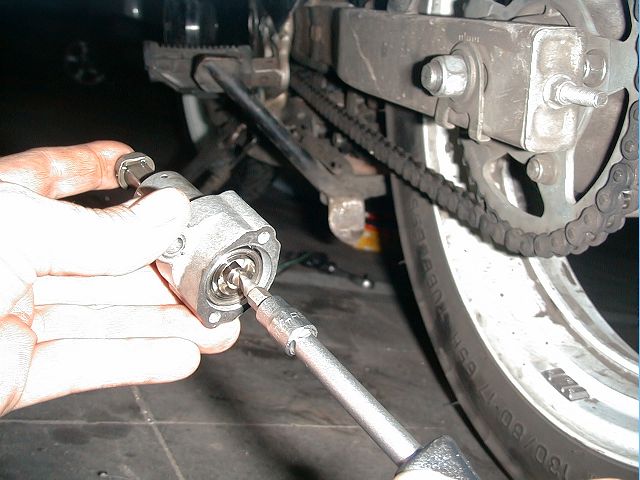
Reinstall chain tensioner:
|
 |
|
 |
Now it's a good opportunity to install a fuel filter.
Install a small piece of hose between the lower "T" of the carbs, attach
the filter to that, and build another piece of hose to connect to petcock
output.
|
 |
Install air filter box. A new air filter element is about 20$. Replace
it if it's dirty or too old.
Do not miss to:
|
 |
Reassemble everything, pull choke and crank the engine.
It should start and you will need to reset idle screw (middle of the carbs) to set it up to 1200RPM. |
 MENU
MENU
- Historique
- En vrac
- Fiche Technique
- Galerie ( indisponible )
- Videos
- Entretien / Mecanique
- Microfiches
- Accessoires / Modifs
- Forum
- Sorties/Rencontres
- Revue de presse
- Liens
- Webmaster
- Contact
 |